How to Install the LED Magnetic Track System: A Step-by-Step Guide
By Amy Topsun lighting
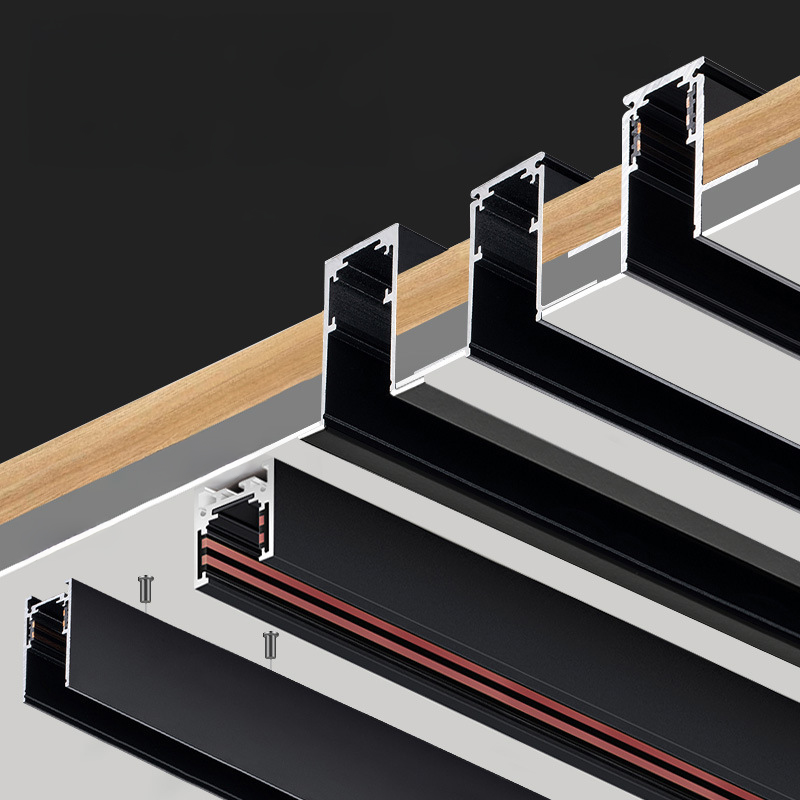
Installing a magnetic track lighting system is quick, straightforward, and requires minimal tools, making it ideal for both DIY enthusiasts and professional installers. This guide will help you learn how to install four types of magnetic track rail: pre-embedded, plaster Installation, surface, and suspended installation.
Magnetic track lighting, as a core component of no-main-light designs, is widely used in residential and commercial spaces due to its flexible installation and convenient disassembly. Installation requires selecting from recessed, surface-mounted, or ceiling-mounted options, based on the stage of renovation and space requirements. The core principles are safe power-off operation, precise positioning and fixing, and standardized circuit connections. Below is the complete process and precautions for the four mainstream installation methods.
Pre-installation Preparation
1. Core Tools and Materials
Tools:
-
Tape measure, level, pencil
-
Electric drill, screwdriver (with Allen wrench)
-
Impact drill, stud finder (optional)
-
Safety goggles, ladder
|
Materials:
-
Magnetic track body, mounting brackets/connectors
-
Self-tapping screws, end caps
-
DC24V/48V low-voltage driver, wires
-
Insulating tape, terminal blocks
-
Splicing plates & power pins (for spliced tracks)
|
2. Key Points for Pre-installation Planning
① Confirm Installation Location and Length in Advance: Determine the track layout (straight/corner) and installation height (ceiling/wall/suspended) based on the lighting design drawings. Measure and customize the track length to prevent excessive on-site cutting, which can lead to uneven joints.② Reserve Power Supply and Access Panel: Reserve a power interface during the electrical and plumbing renovation phase (preferably near the track end). For recessed installations, reserve an access panel for future driver maintenance.③ Match Driver Power: Select the driver based on the total power of the lights on the track, ensuring the total power does not exceed 80% of the driver's rated power. For example, a 120W driver is suitable for tracks with a splicing length of not more than 4 meters, and a 180W driver is suitable for tracks with a splicing length of not more than 7 meters.④ Test Products in Advance: Test the compatibility of the track, driver, and lights before installation to avoid flickering, non-illuminating issues, etc.
3. Safety Prerequisites
The main power supply must be disconnected throughout the installation process. Live operation is prohibited. All operations are recommended to be performed by a professional electrician to ensure that circuit connections comply with safety regulations.
Four Main Installation Methods and Steps
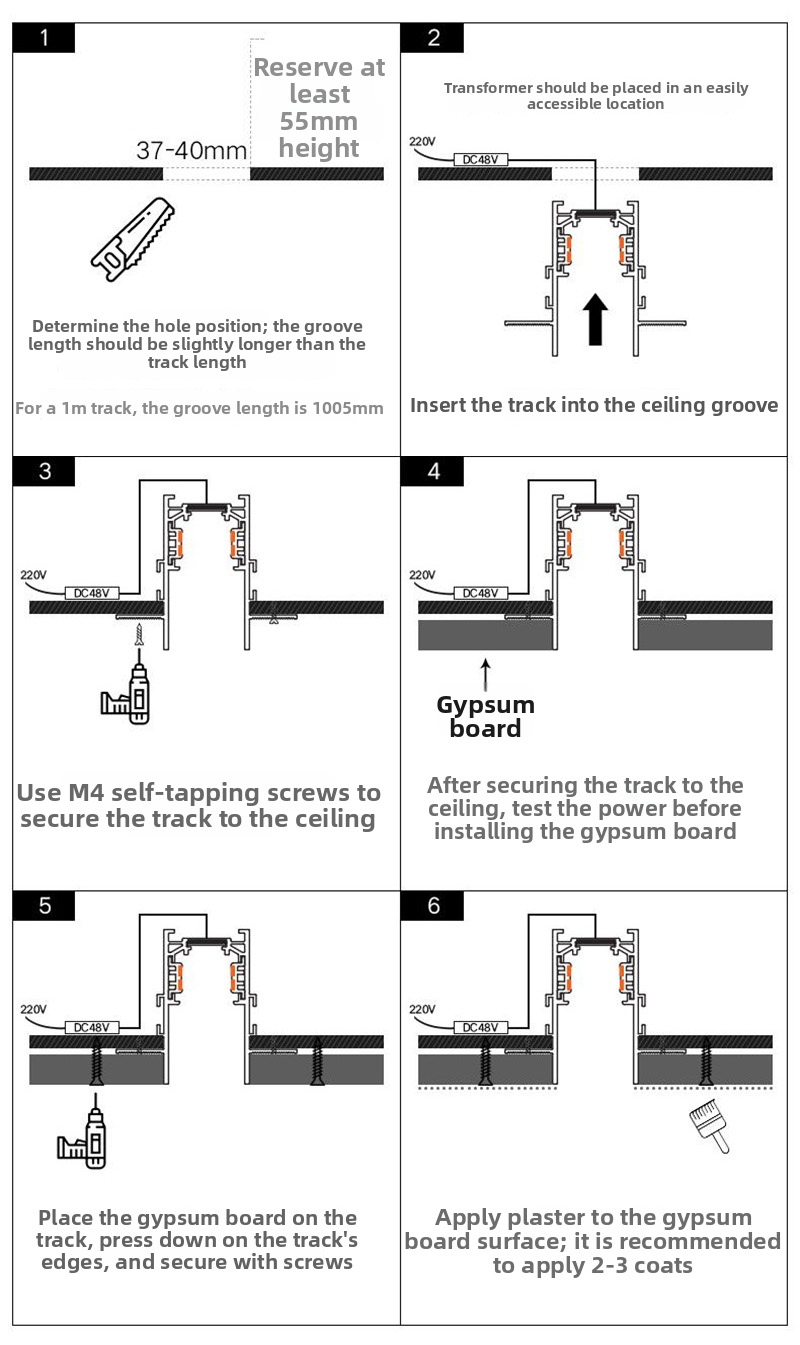
1. Pre-embedded Installation (Plasterboard with Embedded Track):
① First, determine the installation location of the track light and mark it according to the track light's length.② Cut grooves in the marked locations (the transformer is installed near the access panel).③ Fix the track to the ceiling using self-tapping screws.④ Test the power supply to ensure the track installation is standard.⑤ Cover the track edges with plasterboard.
2. Plaster Installation (Requires high-quality artistry; mesh fabric must be used for plastering! Otherwise, cracking will occur later!)
① First, determine the installation location of the track light and mark it according to the track light's length.② Cut grooves in the marked locations (the transformer is installed near the access panel).③ Fix the track to the ceiling using self-tapping screws.④ Test the power supply to ensure the track installation is standard.⑤ Apply mesh fabric and plaster the surface.
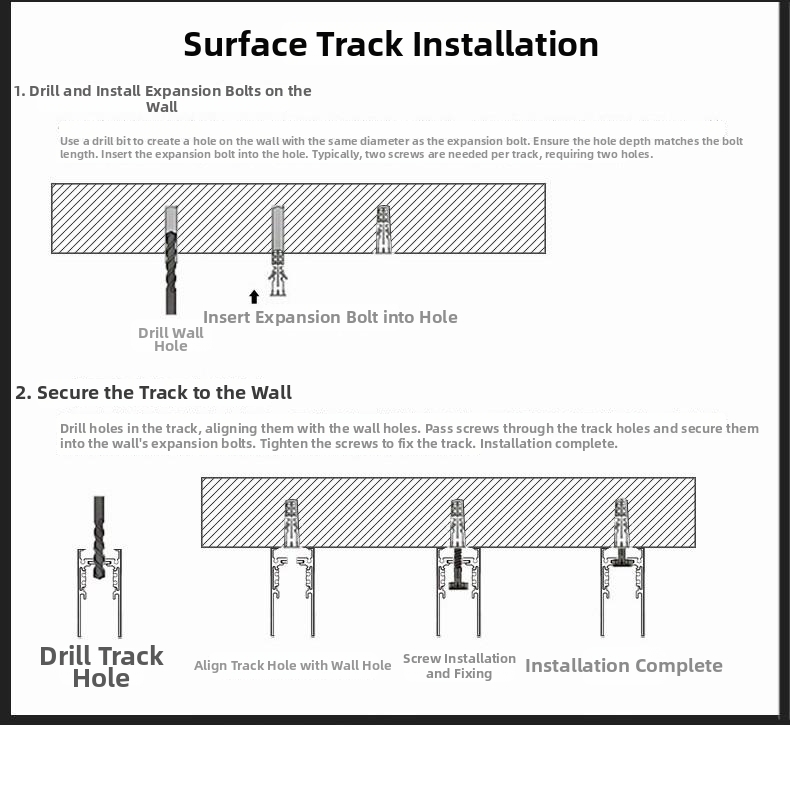
3. Surface-mounted ceiling-mounted installation (Note that the light fixture is relatively heavy; pay attention to the ceiling's load-bearing capacity and tightness during installation.)① First, determine the fixing position of the track.② Next, fix the track to the ceiling (if there are clips, install the clips first, then insert the track into the clips).③ Finally, install the light fixture into the track, ensuring the light fixture is level.④ Connect the power cord (the transformer is installed near the access panel).
4. Suspended installation
① Fix the base pads (pay attention to the ceiling's load-bearing capacity and tightness).② Connect the ceiling plate with screws.③ Install the other ceiling plate (pay attention to the distance between the two ceiling plates).④ Connect the suspension rope and slider.⑤ Push the slider along the slot.⑥ Adjust the position and tighten.⑦ Connect the power cord (the transformer is installed near the access panel).
Installation of Magnetic Track Accessories
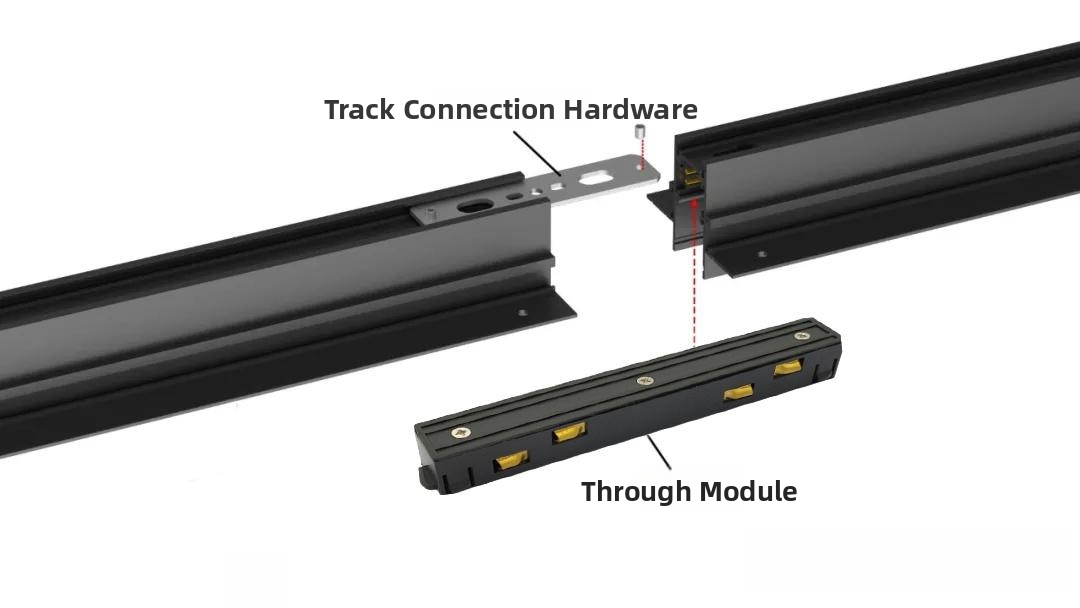
Straight-through Module: Secure the two tracks with track connector hardware, then install the straight-through module using magnetic attraction to connect the two tracks.
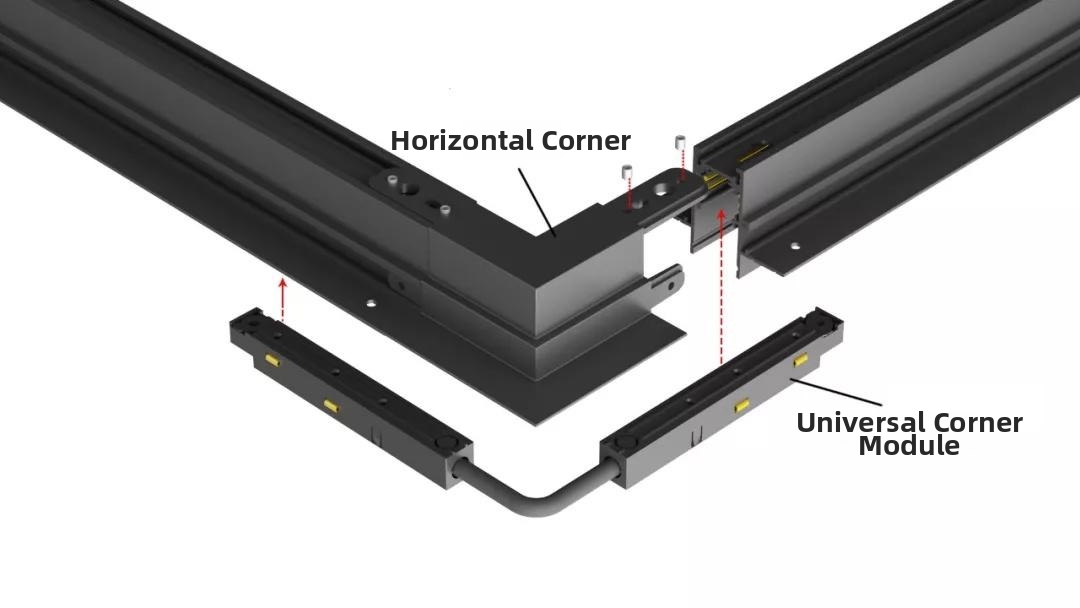
Horizontal Corner/Universal Corner Module: Connect and secure the two tracks using a horizontal corner bracket, then install the universal corner module to complete the circuit connection.
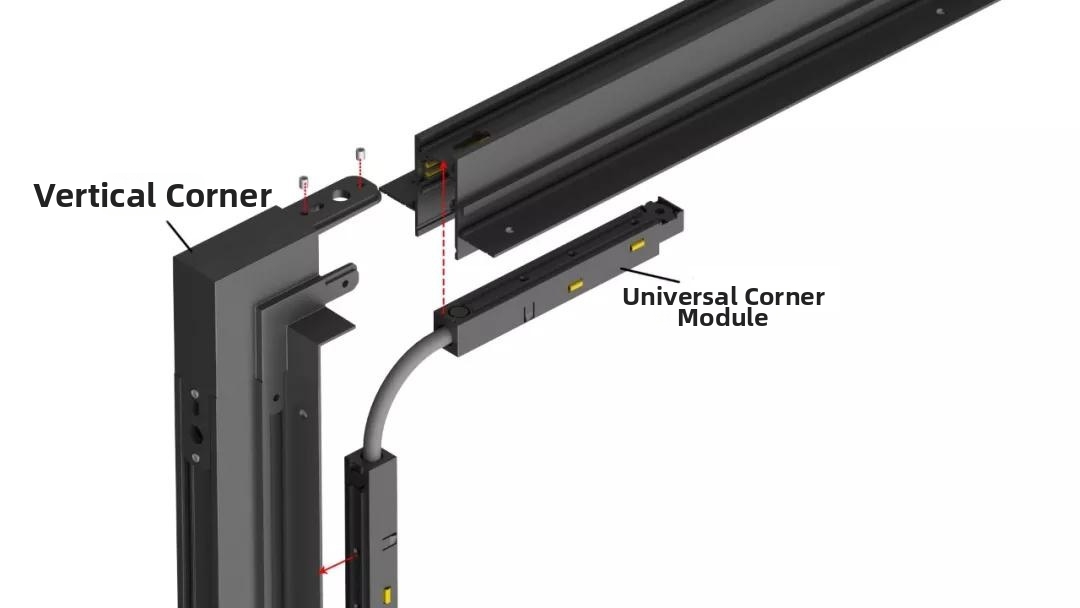
Vertical Corner/Universal Corner Module: Connect and secure the two tracks using a vertical corner bracket, then install the universal corner module to complete the circuit connection.
 Input Module: At the end of the entire magnetic track, install the guide rail side cover, then install the power input module to connect the power supply.
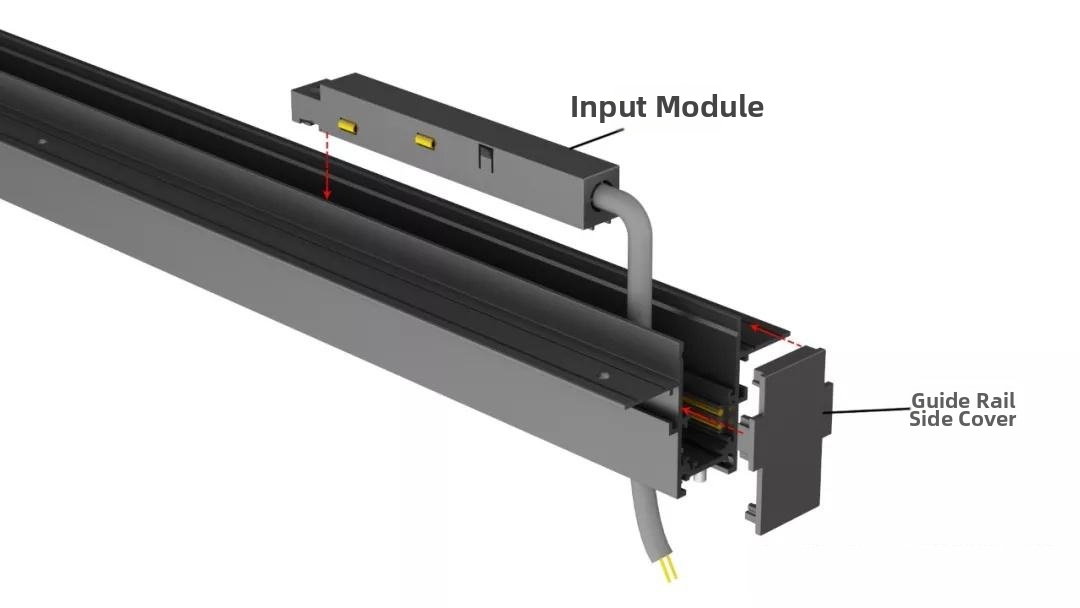
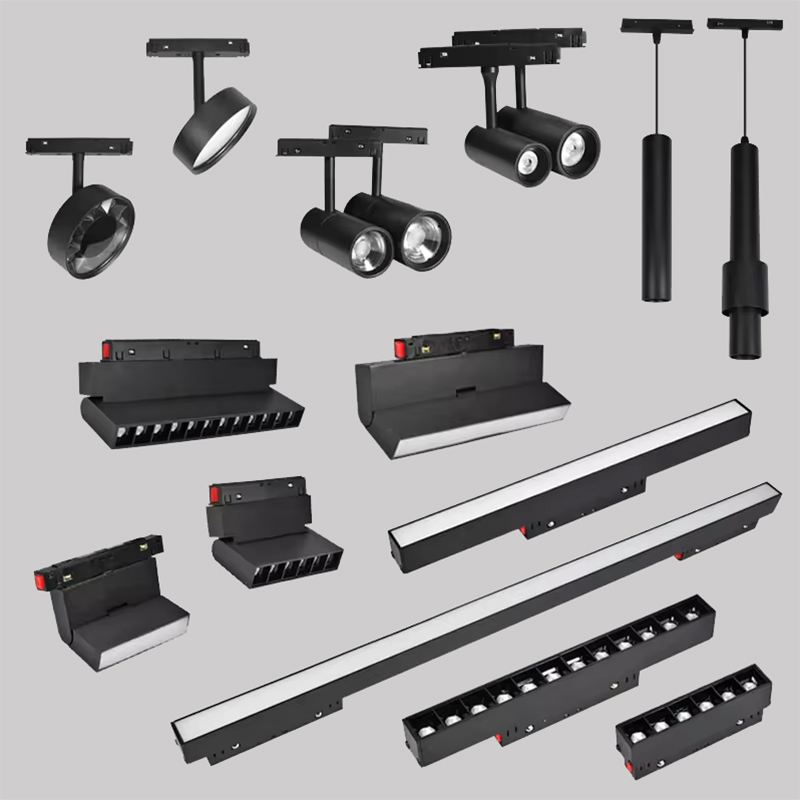
Installation of Magnetic Track Lamps
Various styles are available, freely combinable, with a 48V safe voltage, magnetic installation, and convenient and quick setup – place the light fixture into the track.
Key Precautions of the Magnetic Track System Installation
- Power Matching: Strictly control the total power of the lighting fixtures, not exceeding 80% of the driver's rated power to avoid overload and driver damage; when splicing multiple track sections, match the corresponding driver power according to the total length.- Circuit Safety: Low-voltage magnetic tracks require a dedicated DC48V driver; direct connection to 220V mains power is prohibited; when wiring, be sure to distinguish between positive and negative terminals, and ensure the interfaces are securely sealed to prevent leakage.- Splicing Specifications: When splicing multiple track sections, always connect the power pins first to ensure circuit continuity before mechanically fixing the splice to avoid "power interruption points"; after splicing, check the track flatness to ensure the light fixtures are firmly attached.- Moisture and dust protection: Magnetic tracks are suitable for indoor installation. Avoid installation in damp environments (such as bathrooms and kitchens). During installation and renovation, take precautions to prevent dust and moisture from entering the track and contaminating its conductivity.- Dimming compatibility: For dimming functionality, choose a dimmer compatible with the track drive (such as a Triac or 1-10V dimmer). It is recommended to test compatibility beforehand to avoid flickering, dimming, malfunctions, and other issues.- Post-installation maintenance: Ensure sufficient space is available for maintenance at the drive installation location. If dust is present on the track surface, wipe it clean with a dry cloth. Avoid contact with conductive parts with a damp cloth. When replacing light fixtures, attach or remove the light; disassembly of the track is unnecessary.
Maybe you would like to read: The knowledge of the Magnetic track light
And How to choose the right Magnetic track light?
Previous
How to Design lighting for Bakery Shops?
Read More
Next
How to choose the right LED ceiling lights for home?
Read More